My kids have gone through dipping and non-dipping phases many times. We had a mercifully brief stretch where Boy #1 wanted ketchup at every meal and dunked everything from peas to strawberries in it. While the kids aren't (yet) interested in MY personal dipping fave (blue cheese dressing), they do occasionally want something like ranch dressing (also one of MY personal favorites).
Since ranch dressing is buttermilk-based, I needed to find a substitute. While it doesn't have to be vegan for my household, the recipe I decided to try was nut-based and therefore vegan. My go-to homemade recipe for ranch dressing calls for mixing a blend of herbs and spices (given below) into equal parts mayonnaise and buttermilk. While you can mimic the acidity of buttermilk by adding a little lemon juice to a non-dairy milk, I thought the flavor might still fall flat and that the cashews might help return a bit of richness to the dressing flavor.
Also I have a bottomless bag of chia seeds that I need to use up.
My first attempt at following this recipe exactly as written was underwhelming. My results were on the thin, runny side and rather bland for my taste.
The consistency issue is likely a two-pronged problem...I prefer a thicker, more commercial consistency (the better for dipping, yo) and also I'm using a food processor rather than a Bone Crusher 6000 blender. I have a blender that makes a decent daquiri, but it can't reduce raw carrots to sub-atomic particles. The food processor does better, but it's also no cell-phone grinder. I'd maybe get a thicker, creamier dressing with a higher-powered blender.
In lieu of heavier-duty equipment, I went with heavier-duty ingredients. I doubled the amount of nuts and chia seed, reduced the liquid and went with my personal tried-and-true blend of herbs and spices for what *I* think ranch dressing should taste like. It's a little heavy on the garlic and dill, but that's what I like and I'm not apologizing for it :)
I'd like to try this nut-and-chia recipe head-to-head with an acidified non-dairy milk plus mayo base to see if I prefer one to the other, but for now here's the nut-and-chia vegan version.
Pin It
Saving time, money and aggravation by shopping, planning, prepping and cooking ahead.
FB Plugin
Showing posts with label vegan. Show all posts
Monday, April 21, 2014
Friday, November 1, 2013
Crockpot Black Beans
I loves a good bean recipe. I served this the first night as our main dish with salad and bread (cornbread would have been an excellent accompaniment, but alas was not meant to be that night). I served the leftovers (and there will be a lot unless you're feeding a small army or a couple of teenage boys) as taco filling the next night.
Even though these beans cook all day in a crockpot, you still need to presoak them. Depending on what kind of schedule you have, that might mean soaking overnight (to put in the crockpot in the morning), through a whole day (to prep in the evening for the next day's crockpotting) or doing the boil-two-minutes-then-cover-and-soak-one-hour thing.
Crockpots keep food very moist, so be sure not to add too much stock, otherwise you'll have bean soup instead of beans. Add stock until just before the beans would be totally covered; you should still see little lumpy-bumps of beanage peeking through the surface of the liquid.
Crockpot Black Beans
Makes 8-10 servings
1 lb. black beans, soaked several hours or quick-soaked and drained
2 tbsp oil
2 onions, chopped
2 cloves garlic, minced
1 mild pepper such as anaheim or poblano, chopped
1 red bell pepper, chopped
1 tsp seasoning salt
1 bay leaf
1 14 oz can crushed tomatoes
2 tbsp lime juice
4-5 cups vegetable or chicken broth
Prepare beans. Heat oil in a skillet and saute onions, garlic, peppers and seasonings 5-10 minutes until soft. Stir in remaining ingredients, except for broth. Fridge or freeze, if desired (as a scheduling note, you could do the sauteing the night before Crockpot Day and start soaking the beans at the same time; the next morning mix it all together in the crockpot).
On Crockpot Day, put the onion-bean-tomato mix in the crockpot (still frozen is OK). Add stock to barely cover the beans. Cook on low 8-10 hours.
Pin It
Labels:
beans,
crockpot,
freezer,
garlic,
leftovers,
peppers,
prep-ahead,
stock,
vegan,
vegetarian
Wednesday, October 23, 2013
Dairy-free mac and cheese, Take 1
| This cheese-free mixture combines with almond milk to make the mac-sans-cheese sauce |
So I am exploring the world of cheese-free mac and cheese. As best I can tell, dairy-free mac and cheese recipes fall into 4 main categories...those that use processed faux cheese and plant-based milk for the sauce, those that use miso paste and plant-based milk, those that use some kind of nut puree and plant-based milk and those that use a product called nutritional yeast and plant-based milk.
I'm starting with the last one.
You might remember that I said I wasn't going to make a special trip to get nutritional yeast to make this recipe awhile back...I apparently shoulda gone ahead and done it. So off to my local natural foods store I went. $4.50 for half a pound and it looks like it might last forever.
I've also had to try plant-based milks...we've settled on almond milk mostly because she doesn't barf it back up and that's good enough for us. I was surprised to see that most plant milks have added sweetener. When I compared the nutritional information on these milks with cow's milk though, I realized that without the additional sugar, most of these milks (the ones made from protein sources like nuts anyway) are far lower in calories and natural sugar than cow's milk. Great for adults who want to cut calories, not so great for growing babies. There are flavored versions of most non-dairy milks, and those have LOTS more added sugar which we *will* be avoiding. Just a tidbit for you. Back to the recipe.
I tried this recipe from the Bad Mama Genny blog. I liked that it was easy, fast and could sit on the shelf like the boxes of mac and cheese do. Nice and easy for me or my Dear Husband to throw together for a quick kid-friendly meal. And it absolutely was. And Miss H LOVED her cheese-free mac.
Full disclosure...the boys did not like this. They were 100% rock-solid prepared for Kraft and were disappointed. I thought it needed a little acidity from, say, some white wine vinegar or tomato paste, but otherwise I'd absolutely eat it again.
Full disclosure...I'll probably make up a few small jars of this mix (as recommended here, though I prefer the sauce-to-pasta proportions of the above-linked version) and make it just for Miss H while continuing to keep the boxed stuff, the "real" stuff for the boys. And I'll keep trying other recipes too.
Pin It
Labels:
almond milk,
dairy-free,
fast,
kid-friendly,
nutritional yeast,
pasta,
vegan
Sunday, June 9, 2013
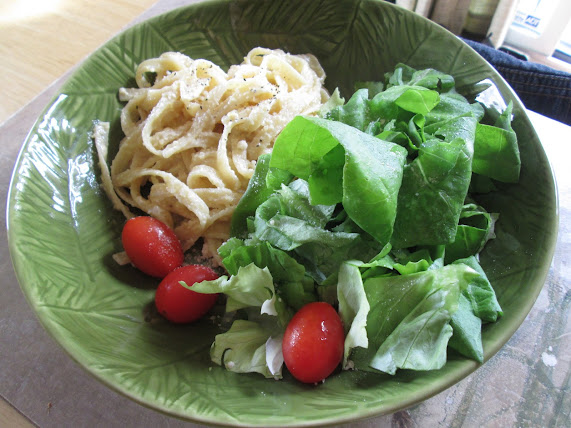
Fettucine with (vegan) White Pesto
Oh my, this is my 300th post!
One of my pet peeves about special diet (vegan, vegetarian, gluten-free, sugar-free, whatever) cooking is the convention of naming a recipe after a foodstuff that it kinda sorta resembles if you pinch your nose and squint real hard while you eat (e.g. Mock Sausage, Sugar-Free Caramel, Scrambled You-Won't-Believe-They-Aren't-Eggs, and all those plant-based "cheeze" sauces out there).
C'mon (vegan, vegetarian, gluten-free, sugar-free, whatever) folks...you know these are tasty recipes that stand on their own without trying to stand on the shoulders of a "missing" ingredient. The practice reeks of an inferiority complex and besides, you're inevitably setting your dining companions up for failed expectations if you tell them you will be serving something like is *almost* like sausage/cheese/eggs/etc. but isn't.
This is one such recipe. It's from Christian Pirello of Christina Cooks and she calls it Vegan Fettucine Alfredo. Actual alfredo sauce is buttered heavy cream, cooked down until it's super-thick and finished with fistfuls of parmesan cheese. It's a heart attack in a pot.
This heart-healthier, plant-based "fettucine alfredo" is really NOTHING like real fettucine alfredo. My husband made the snooty-face when he first tasted it because he was expecting something alfredo-y.
What it IS is awfully darn good once you get around that misnomer. Once he got over his "this isn't alfredo" reaction, my husband loved it (ofc he did sprinkle some parmesan cheese on top of his, because pasta just isn't pasta until there's a flurry of parmesan on top in his world).
What the recipe IS is a white pesto...the only difference between this dish and a "true" white pesto is the relatively small amount of parmesan cheese which is understudied in the vegan production by miso paste. No need to pretend like it's alfredo...it's pesto!
My one serious deviation from her recipe (aside from changing the name) is to omit sweetener. I'm not quite sure why, but she feels the need to put brown rice syrup in everything. This dish doesn't need it.
Lastly, the pesto (as with all pestos) can be made in advance and frozen. Just thaw it and add it to cooked pasta.
Pin It
Labels:
fast,
freezer,
garlic,
make-ahead,
miso,
pasta,
pinenuts,
vegan,
vegetarian
Monday, May 6, 2013
Pepperoni-spiced seitan & veg packets
This is one post that can be read for 2 distinct recipes...the first is a dinner-in-a-packet recipe that works for both vegetarian and carnivorous proteins, and the second is for a pretty darn tasty (and new to us) vegetarian protein called seitan.
Say what?? Seitan (it's pronounced say-tahn). It's made from wheat gluten (which is wheat flour with most of the starch removed...I don't know how they do this, but you buy it in "specialty flours" part of your baking aisle) which is the proteiny part of the grain. You combine it with some flavoring ingredients and liquid, then shape it and simmer it in broth or bake it to make a product that can be used as a vegetarian protein substitute in any number of ways.
I really like it for two reasons...1) the wheat gluten is a little pricey (about $7/lb.) but one bag makes several batches and it winds up being a very inexpensive vegetarian protein (only beans are cheaper), and 2) you can throw it together out of pantry and refrigerator staples (beans are also a good pantry staple, but I know a lot of folks don't care for beans...seitan is a toothy vegetarian protein in the vein of frozen tofu or tempeh). It is also a soy-free vegetarian protein, if one wants to avoid soy.
Seitan takes some time to make in the first place...you either have to simmer it for an hour or so or bake it (my preferred method) for 60-90 minutes, depending on the exact recipe. But you can make several batches at once and freeze them for future use. A good basic (i.e. seitan with a pretty plain, versatile flavor profile) recipe can be found here (there's also a recipe for using vital wheat gluten as an egg-replacement binder in bean burgers on this site...that recipe is good too!)
I've used seitan in stirfries, either just plain cut-up or "velveted". I've grilled slices of it after basting with barbecue sauce. And I've made these packets with it. I've also made the packets with actual sausage and they're good both ways. For the purposes of these packets, I like the following seitan recipe which mashes up this seitan recipe with the seasonings called for in the pepperoni recipe in Michael Ruhlman's Charcuterie.
Something that is obvious in hindsight is that wheat gluten is what gives bread its structure as it rises. I prefer baking seitan to simmering it and you need to make sure to keep the seitan dough compressed by wrapping it very well in foil to keep it dense and chewy. At least two full wraps around with the ends twisted or folded off. If you wrap it so the ends of the foil overlap by just a little bit, the seitan will rise (like bread), bust out of the foil, make a mess and lose the dense, toothy texture you're after. I screw up so you don't have to.
Last note...seitan is often a vegan recipe. The recipes above call for something called nutritional yeast to provide a salty umami depth of flavor and a hit of vitamin B12 in the absence of all animal-derived products. I'm not particularly invested in keeping my seitan 100% vegan, so I use parmesan cheese (the kind out of a can) instead of nutritional yeast. It's been working for me. Also note, if you are cooking for a vegan, the velveting process uses egg whites and will be not be suitable.
Pin It
Labels:
eggplant,
freezer,
make-ahead,
peppers,
potatoes,
prep-ahead,
sausage,
seitan,
vegan,
vegetables,
vegetarian,
zucchini
Wednesday, December 19, 2012
Pumpkin Gnocchi
Gnocchi are sturdy little bite-size dumplings that are often made with mashed potatoes, but other veggies can form the basis for them too. They usually have an egg as a binder, and I like that this recipe uses an alternate (therefore allergy-free and vegan) binder that takes advantage of leftovers, if you have leftover rice. There original recipe comes from a PBS vegan cooking show called Christina Cooks. I choose to serve mine with a non-vegan browned butter and sage sauce.
The tricky thing about this recipe is controlling for moisture content...you can't. Your pumpkin may have more or less water than average, and even how soon you puree and use your cooked rice alters its moisture content. I made rice special for this recipe and (as usual) made too much. I pureed all the rice immediately (thinking I'd freeze some as "rice cereal" for the baby) and clouds of steam poured out of the food processor. By the time I finished the gnocchi dough, the rice left in the processor was dry and sticky...I suspect that if I'd used the rice at that stage, I would have needed less semolina in my gnocchi dough. I also suspect using leftover rice rather than freshly prepared hot rice would have had the same effect. So the amount of semolina you use is very approximate...keep adding until it's the right consistency.
Which, by the way, is like a soft cookie dough. You want the dough to hold together when you boil the dumplings but you don't want the dough so stiff that the dumplings are like concrete when you cook them. So you want a dough that can be controlled with a light dusting of flour on your hands and work surface when you roll it out, but not as stiff as, say, a pie dough or cutout cookie dough.
And the semolina...I don't know if you could easily substitute regular wheat flour for the semolina flour. They're both wheat products, but the semolina feels like cornmeal. It's also a higher-gluten flour than regular all purpose flour. You can't substitute cornmeal either because cornmeal doesn't form gluten bonds and therefore won't bind properly. I didn't have a hard time at all finding semolina flour...it was on the baking aisle at my decidedly non-fancy grocery store with "specialty" flours. Bob's Red Mill was the brand available. For what it's worth, I've made other gnocchi-type dumplings before from different recipes that used regular flour and I thought they were heavier and chewier than the gnocchi I made with the semolina.
Lastly, this recipe calls for 1 cup pureed pumpkin. I used canned pumpkin. 1 cup is about 1/2 a 15 oz. can. I HATE having half-a-can of stuff leftover. You could double up the recipe (especially since you can freeze the uncooked gnocchi!) or make pumpkin muffins, pumpkin seafood chowder, or pumpkin pancakes. You can use homemade pureed pumpkin or I bet even other types of pureed squash though, again, these changes will affect the moisture content of the dough and change how much semolina you need.
Pin It
Tuesday, November 29, 2011
Tempeh Salad
![]() |
| Packed for eating on the run tonight. |
Tempeh is a soy-and-grain based food product that has a sturdy texture (unlike tofu) and a robust flavor (also unlike tofu). I'm not going to say that when you eat it, you'll think you're eating a steak but it hits the same textural and flavor points that a lot of meat products do. In fact, as I was cooking this one day, I had a delivery person at the door who commented that dinner smelled really good and he thought he might make some sausage for dinner, too LOL
I like wilted salads, so I top the greens with the hot tempeh mixture. I get a little crunch by leaving the bell pepper and celery in this recipe raw. You could saute the pepper and celery as well, though and wait for the whole mixture to cool before adding to the salad for a different effect.
Pin It
Labels:
celery,
chickpeas,
fast,
five spice powder,
lettuce,
make-ahead,
peppers,
salad,
spinach,
tempeh,
vegan,
vegetarian
Wednesday, November 2, 2011
Garlic Artichoke Pasta
I <heart> artichokes. They're supposedly cancer-fighting and they're exotic and they're amazing with butter. That's the first thing that made me want to try this recipe from the Better Homes and Gardens Better Than Mom's Slow Cooker Recipes book. The second thing was that this is a recipe that is made practically entirely from pantry goods without being one of those can-of-cream-of-death-soup type of recipes. You can buy all the ingredients you need for this ahead and keep them on-hand as a pantry meal kit. You can also prep the crockpot mixture ahead to fridge or freeze.Until I had a toddler, we never had dairy beverages in the fridge routinely. I had to buy milk or cream or half-and-half specifically for a recipe that called for it. These days, I use whole milk for all recipes calling for cream or half-and-half because it is what we have in the fridge. So use whatever you happen to have here (or use canned evaporated milk, if you are like pre-toddler, dairy-drink-less me) if you throw this recipe together out of "ingredients on hand". If you're planning to make a meal kit for this recipe, you can freeze an appropriate amount of milk or cream, rely on having some in the fridge on Dinner Day or buy canned evap milk for the "pantry kit".
Comparatively, cream and half and half will be the highest in calories and fat, then evaporated milk and regular milk. If you get non-fat evap milk, you'll get the best of both worlds...the lighter caloric/fat profile of milk with the rich mouthfeel of cream.
So a meal kit for this recipe will look like this: canned tomatoes, canned artichokes, box of pasta and can of evap milk (if using) labelled and stored in the pantry with garlic+dry herbs and milk/cream (if using) on hand or frozen in ziptop bags. OR everything except milk mixed together and frozen with pasta/evap milk in the pantry.
The one gripe I have about this recipe is that it's a crockpot recipe that still requires significant cooking right before dinner. The joy of the crockpot is that you don't have to cook at dinnertime, right? Boiling pasta isn't hard, but getting the water up to a boil takes time...more time than I'm willing to spend to "finish" a crockpot meal.
The solution is to cook the pasta almost fully in advance, toss it with a bit of oil or butter to keep it from sticking, fridge it and stir it into the crockpot at the end to warm up and finish cooking through. Or you can boil the pasta at the last minute, whatever works with your schedule. Just please don't rinse the pasta...rinsing washes away starch which will prevent the pasta from sticking to itself but then it also won't stick to the sauce. Besides, the starch is where the flavor lives (yes, pasta does have a flavor of its own) so rinsing washes away flavor, too.
Pin It
Labels:
artichokes,
crockpot,
evaporated milk,
freezer,
garlic,
kit,
kits,
make-ahead,
pasta,
prep-ahead,
shop-ahead,
tomatoes,
vegan,
vegetarian,
what do i do with
Wednesday, May 25, 2011
Broccoli Rice Salad
I spent part of a summer in France many, many moons ago, and to be expected, my culinary world was transformed by the exposure to French foods and French cooks. However, not so expectedly, my favorite foods from this trip are the French gastronomic equivalents of PB&J (which they do NOT have in France)...ham and butter sandwiches, grilled sausage served in split baguettes instead of hot dog buns, salads made of a single perfectly ripe and lightly dressed vegetable, fresh-picked plums (oh the plums!), and rice salads.
I was one of about a dozen volunteers, both French and de l'étranger , and we took it in turns to cook for the group. Several times we had salads composed of rice mixed with leftover meats, black olives, chopped fresh onion and peppers, summer corn, and just about anything else that needed using up. Like I said, it's not fancy food, but it was revelatory for me. I had no idea leftovers could be, well, delicious! It holds at room temperature very well, too, so it's an excellent potluck/pitch-in/picnic dish.
As implied, you can make a rice salad out of just about anything on hand. A few cups of rice (even that can be a leftover), a couple cups of cooked chicken, beef, pork, canned tuna, salmon mixed with a couple cups of vegetables (fresh or leftover), any herbs that are handy, some olives or pimiento and a little bit of salad dressing is all you need.
The following salad uses up raw broccoli stems and is a vegetarian/vegan (depending on the exact ingredients of your salad dressing) dish. To peel the broccoli, cut the bottom inch or so of stem off. Stand the stem on its "floret" end (after removing the florets for another use), and use a knife to slice the woody peel away. Then shred the broccoli using a food processor or hand grater.
Pin It
I was one of about a dozen volunteers, both French and de l'étranger , and we took it in turns to cook for the group. Several times we had salads composed of rice mixed with leftover meats, black olives, chopped fresh onion and peppers, summer corn, and just about anything else that needed using up. Like I said, it's not fancy food, but it was revelatory for me. I had no idea leftovers could be, well, delicious! It holds at room temperature very well, too, so it's an excellent potluck/pitch-in/picnic dish.
![]() |
| The transition between the tough, outer layers and the tender, light green "meat" is clearly delineated. |
The following salad uses up raw broccoli stems and is a vegetarian/vegan (depending on the exact ingredients of your salad dressing) dish. To peel the broccoli, cut the bottom inch or so of stem off. Stand the stem on its "floret" end (after removing the florets for another use), and use a knife to slice the woody peel away. Then shred the broccoli using a food processor or hand grater.
Pin It
Labels:
broccoli,
carrots,
fast,
make-ahead,
picnic,
pitch-in,
rice,
sunflower kernels,
vegan,
vegetarian
Subscribe to:
Posts (Atom)